[IntelliJ] IntelliJ + Github 연동하기
인텔리제이에서 내가 만들었던 프로젝트를 깃헙에 연동 하려면 어떻게 해야 하나 알아보자.
▶ 1. Intellij Github 연동 설정
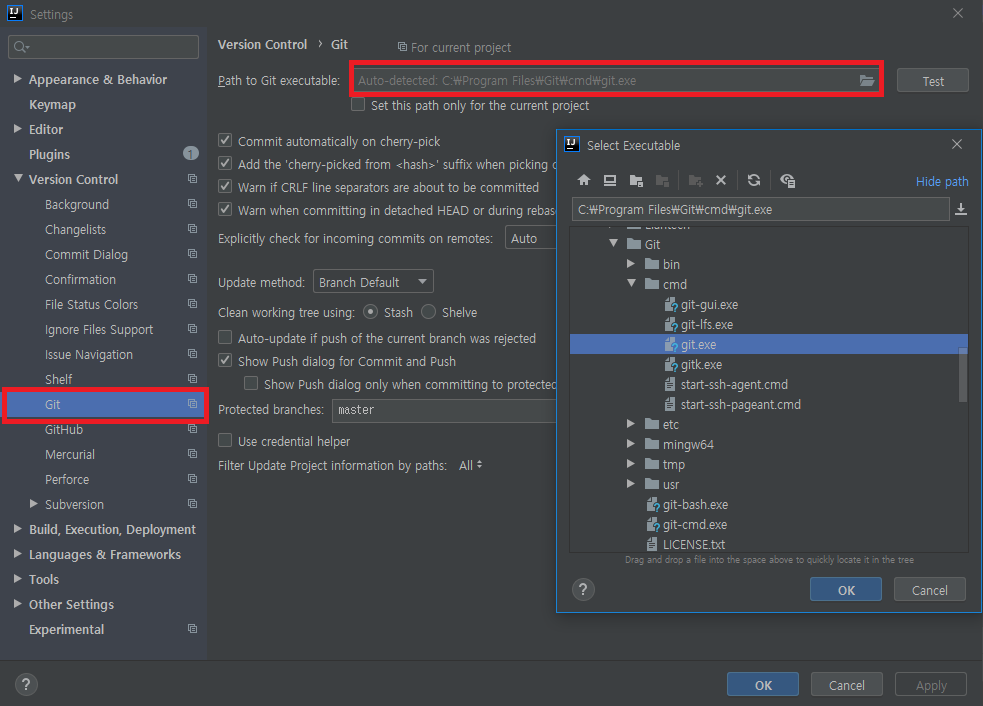
1) Git 실행 설정
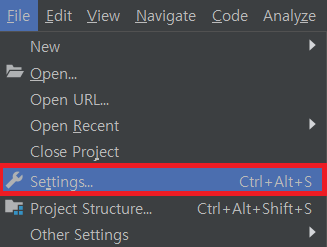
- File >> Settings 클릭
- 설치했었던 Git의 실행파일 경로를 지정
( 혹시 Git이 설치 안되어 있다면 다음 내용 참고 - https://goddaehee.tistory.com/216)
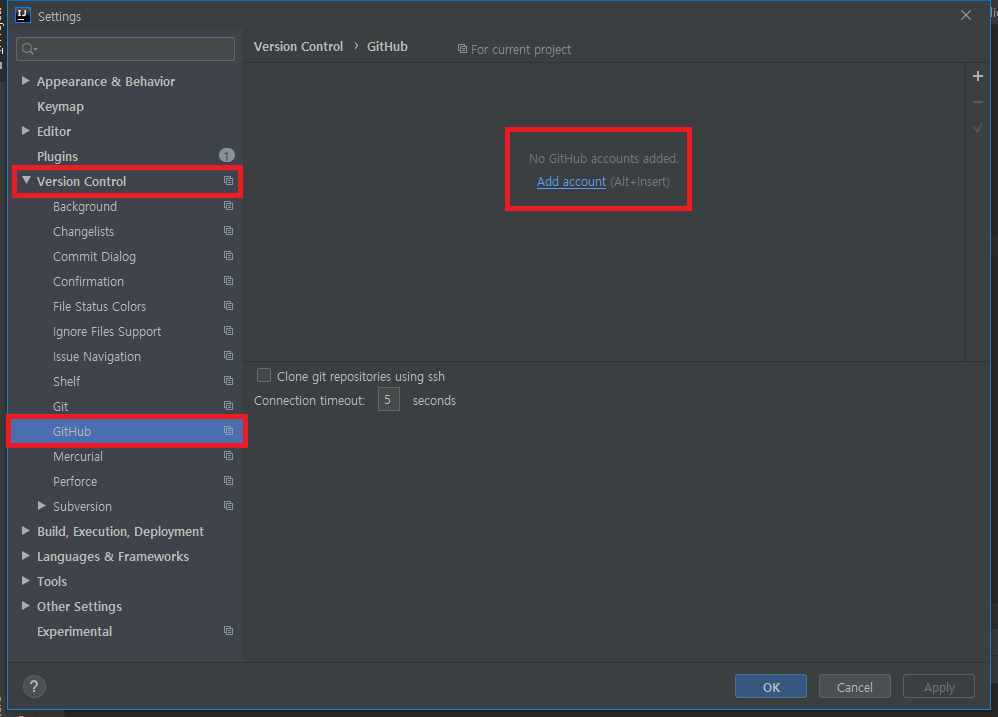
2) GitHub 계정 연동
- GitHub과 IntelliJ 연동을 위해 기존에 생성하였던 GitHub계정을 등록 한다.
(혹시 GitHub 가입이 안되어 있는경우 다음 참고 - https://goddaehee.tistory.com/218)
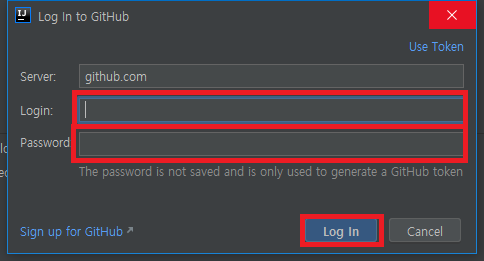
- 계정 및 Password 입력
▶ 2. Intellij Github 연동
1) 첫번째 방법 : 프로젝트 명으로 자동으로 Repository를 생성하여 Github 연동
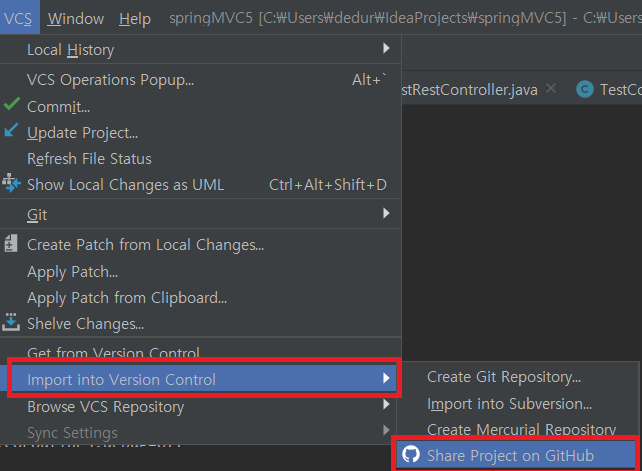
- VCS >> Import into Version Control >> Share Project on Github 클릭
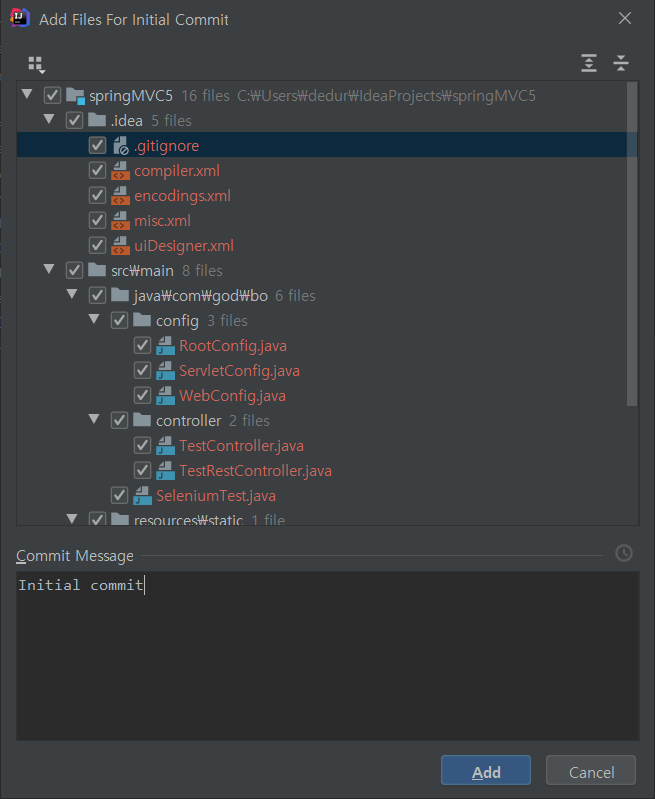
- 최초 Commit
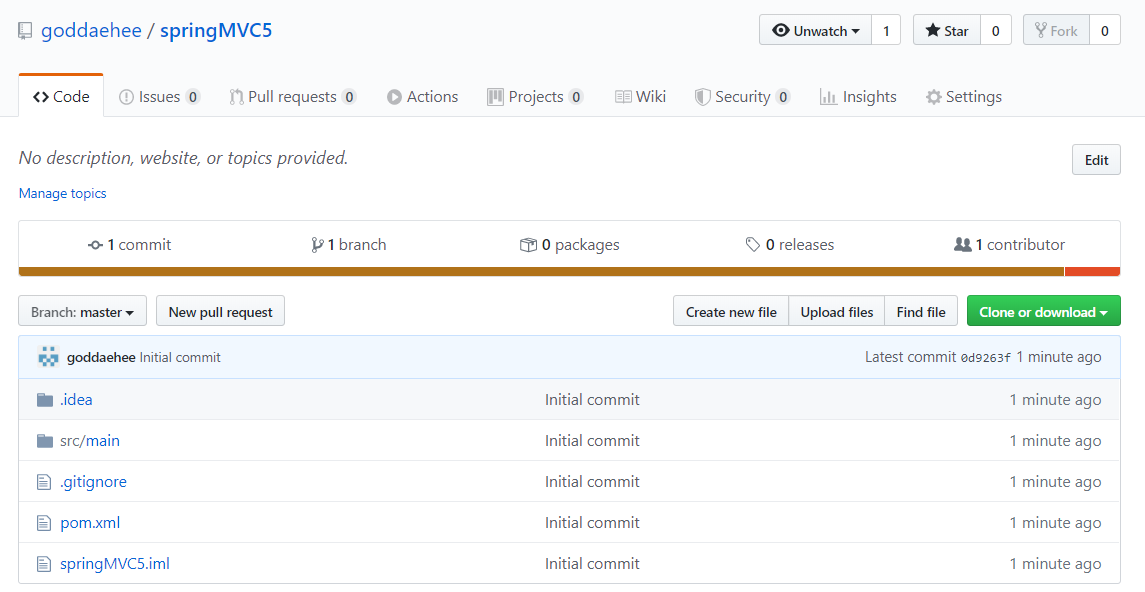
- 기존 프로젝트 명과 동일하게 Github과 연동된 것을 볼 수 있다.
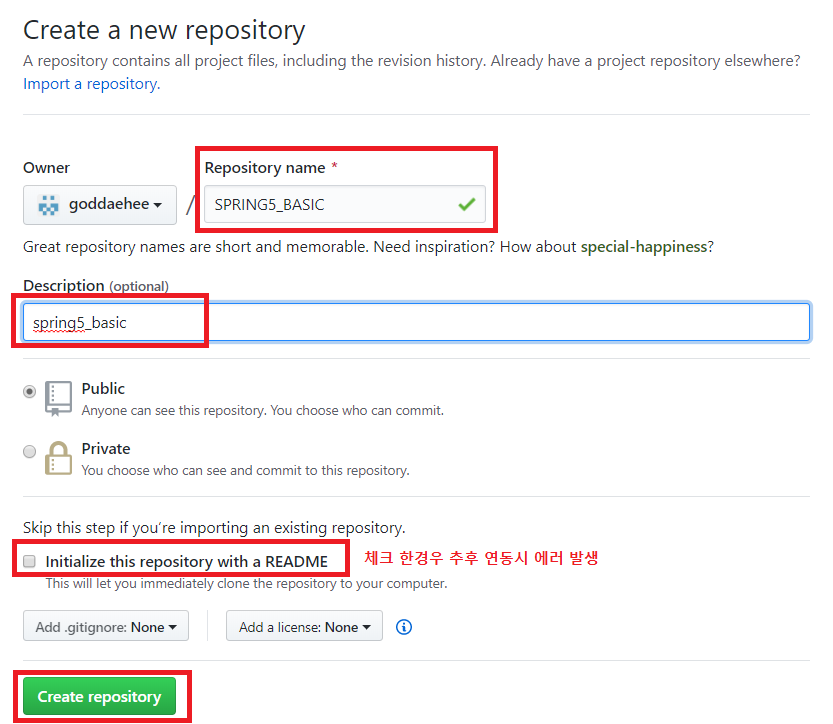
2) 두번째 방법 : Github에서 Repository를 생성하여 Github 연동
- Github Repository 생성
- VCS >> Import into Version Control >> Create Git Repository... 클릭
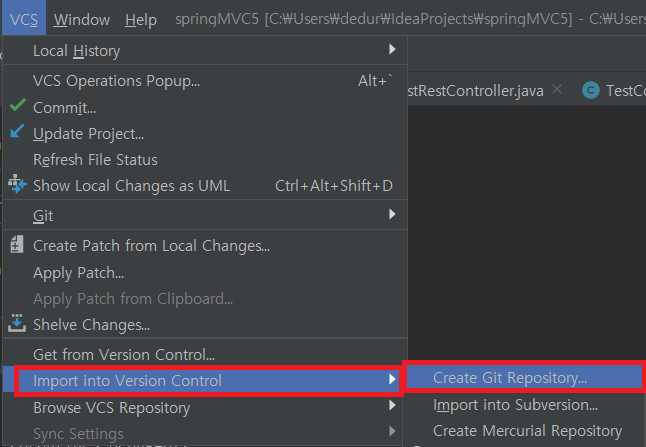
- 원하는 프로젝트 선택

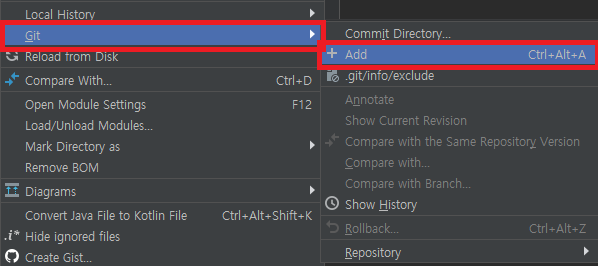
- Project 폴더에서 마우스 우클릭 >> Git >> Add 메뉴 클릭
( Add를 통한 스테이징 영역 파일 추가 작업이다. ($git add [ <파일명> | * ])
( Commit 전 Add 를 통해 준비영역(Staging)에 코드를 저장하는 작업 처리 방법.)

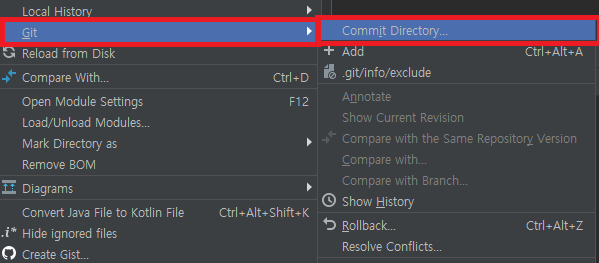
- Project폴더에서 마우스 우클릭 >> Git >> Commit Directory
(Commit을 통한 배포 확정 ($git commit -m "commit 설명"))
(Commit하여 Local Repository(Head) 에 코드를 저장하는 작업이다.
즉, 변경사항을 확정하여 Local 영역에 저장하는 방법이다.)
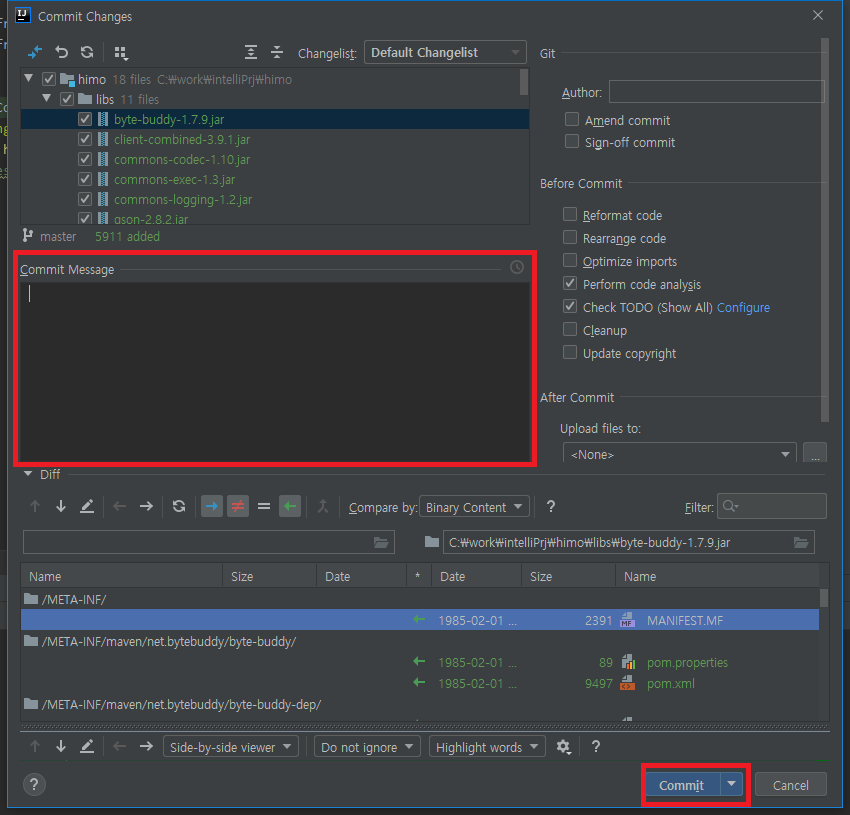
- 변경 파일의 Font-Color의 의미는 아래와 같다.
Red - Workspace Files
Green - Staged Files
Blue - Modified Files
White - Commited Files
Gray - Deleted Files
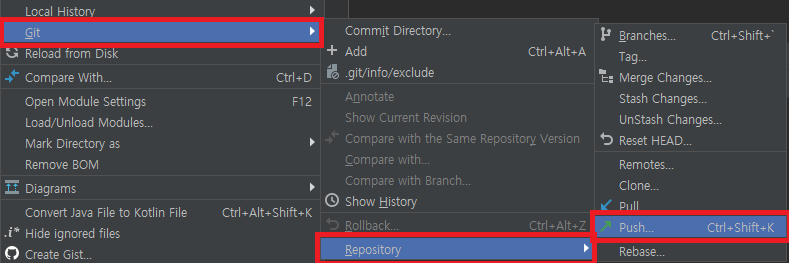
- Project폴더에서 마우스 우클릭 >> Git >> Repository >> Push
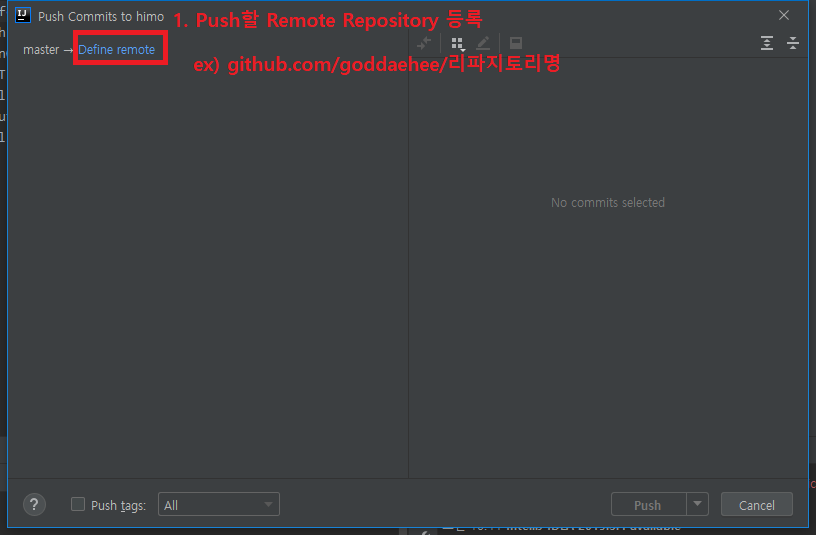
($gir remote add origin [원격서버주소])
(Local Repository => Remote Repository 로 소스를 발행하는 단계이다.)
- Define remote를 클릭하여 좀전에 만들어 주었던 Repository 경로를 입력한다.
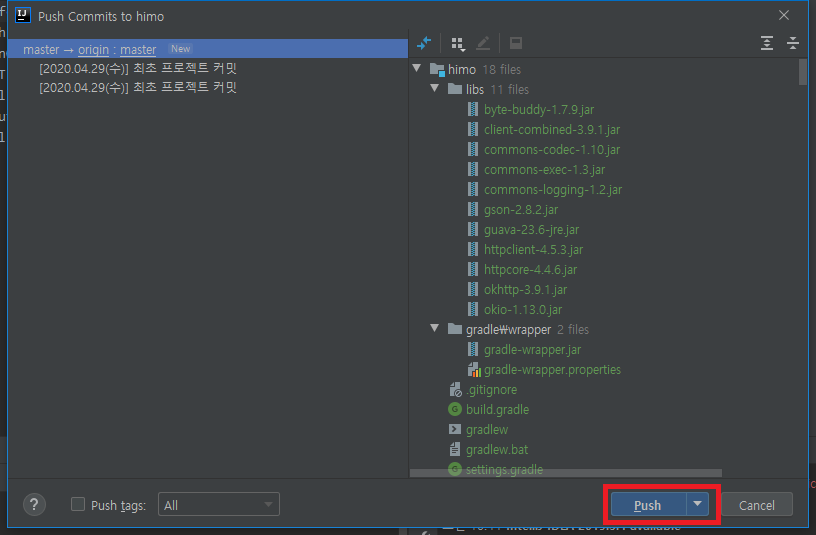
- 변경될 파일을 확인 후 Push 버튼을 클릭 한다.
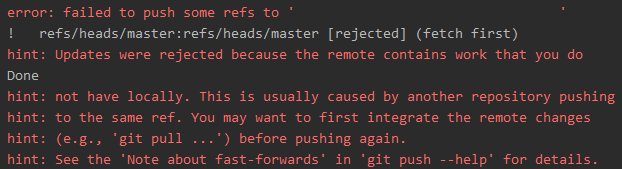
※ 참고
- 혹시 프로젝트를 생성할 때 자동으로 READEME.md 파일을 생성했다면 다음과 같은 오류가 발생할 수 있으니 참고 하자.

- 두가지 방법을 통해 GitHub과 로컬 프로젝트의 연동하는 방법을 알아 보았다.
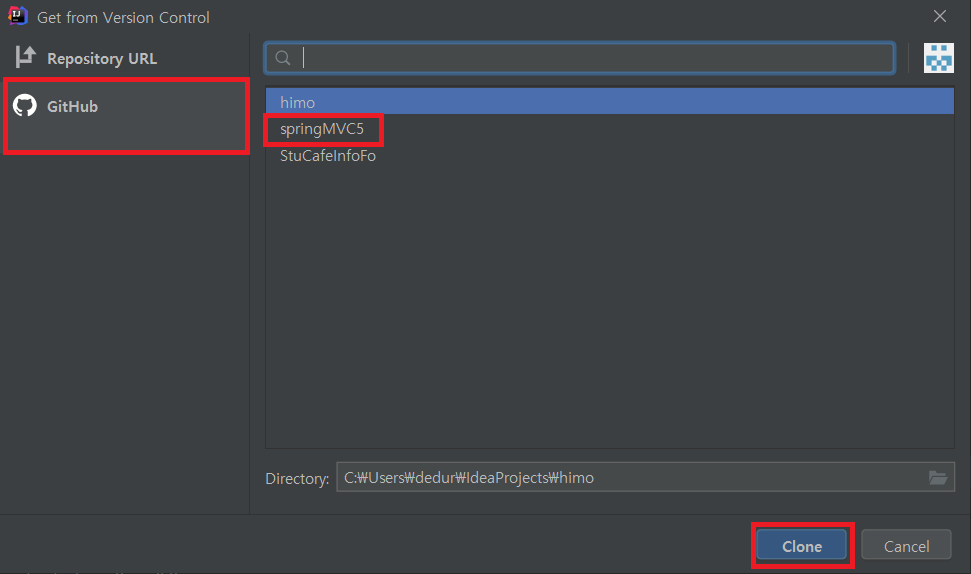
▶ 3. Github Repository Clone
1) Clone을 통해 Repository를 가져오자.
- SVN의 CheckOut의 개념과 유사하다.
- Remote Repository의 소스 코드를 Local로 가져옴과 동시에 Local Repository를 생성한다.
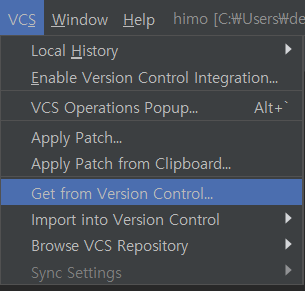
- VCS >> Get from Version Control... 클릭
- Repository URL을 통해 연동하거나, GitHub 계정의 프로젝트를 직접 선택하여 연동 가능하다. Clone 버튼을 클릭.
이로써 간단하게 IntelliJ와 Github을 통해 프로젝트를 연동하는 방법들을 알아 보았다.
출처: https://goddaehee.tistory.com/249 [갓대희의 작은공간:티스토리]
'Study > Git' 카테고리의 다른 글
| [Git] Git Remote origin already exists 에러해결 remote origin 삭제 (0) | 2024.01.24 |
|---|---|
| [Git]GitHub에 프로젝트 올리기 (0) | 2024.01.24 |
| git clone password 인증 오류 (0) | 2022.08.08 |
| git 명령어 (0) | 2022.06.21 |
| Git Merge와 Rebase의 차이 (0) | 2022.05.13 |


댓글